-
-
- Install Barcode ActiveX Add-in in Excel
- Barcodes in MS Excel
- Create Sequential Barcode Labels in Excel
- Add Supplemental Text to Barcodes in Excel
- Extract Barcode Images from MS Excel
- Create Dynamic Barcodes Using LinkedCell in Excel
- Supplemental Text in Barcodes Using LinkedCell in Excel
- Barcodes in Excel with VBA
-
-
- BackColor
- BackStyle
- Barcode
- BarcodeColor
- BarcodeTextColor
- BarcodeTextFont
- BarcodeTextVisible
- BarcodeTextPosition
- BarcodeTextStretch
- BarHeight
- BearerBars
- BottomText
- BottomTextAlignment
- BottomTextColor
- BottomTextFont
- BottomTextVisible
- ControlAlignment
- ControlAutosize
- DataMatrixSize
- LinkedCell
- OptionalCheckChar
- Orientation
- OutlineColor
- OutlineStyle
- OutlineVisible
- OutlineWidth
- Padding Left/Top/Right/Bottom
- PDF417Columns
- PDF417ErrorCorrectionLevel
- PDF417RowHeight
- PDF417Truncated
- Picture
- QRCodeErrorCorrectionLevel
- QRCodeSize
- QuietZone Horizontal/Vertical
- Symbology
- TopText
- TopTextAlignment
- TopTextColor
- TopTextFont
- TopTextVisible
- UnitOfMeasure
- VerticalBarTextEntry
- WideToNarrowRatio
- XDimension
-
Barcode ActiveX Control
Barcode Labels in MS Word Mail Merge
Barcode Labels in Word using Excel Data
- This tutorial shows how to create barcode labels in MS Word Mail Merge.
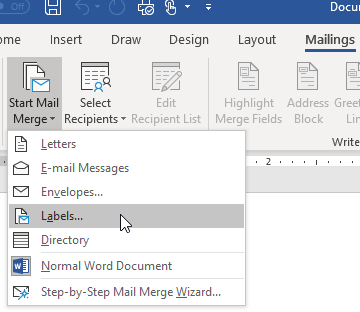
Step 1. Start Mail Merge
- Open the Mailings tab and click on Start Mail Merge > Labels...
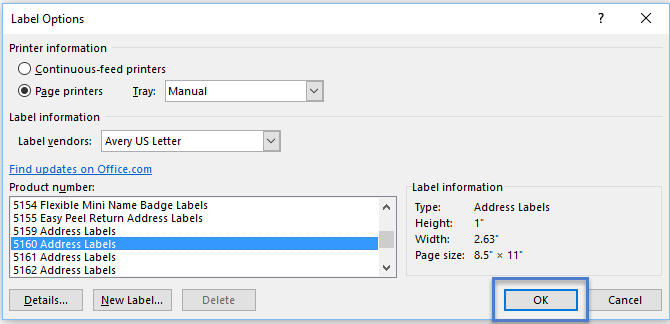
Step 2. Select Label
- Select the label format you would like to use. We are using Avery 5160 Address Labels here.
- To create your own custom label, click on New Label... instead.
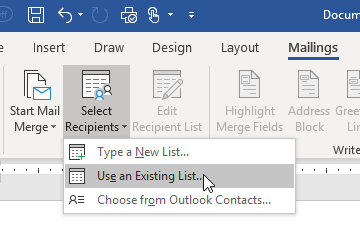
Step 3. Select data for the label
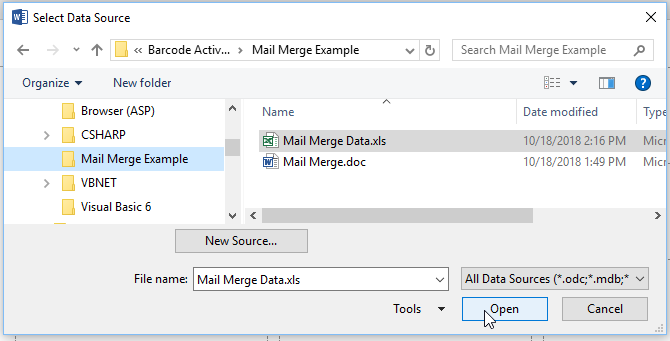
- Click on Select Recipients > Use Existing List and select the Excel file you would like to use.
- Select the Excel file
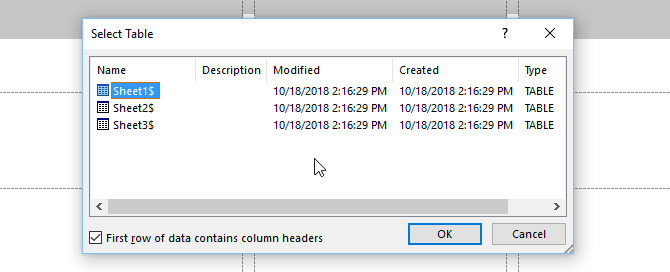
- Our Excel file simply looks like this:

- Click OK to open Sheet1 (the default setting here).
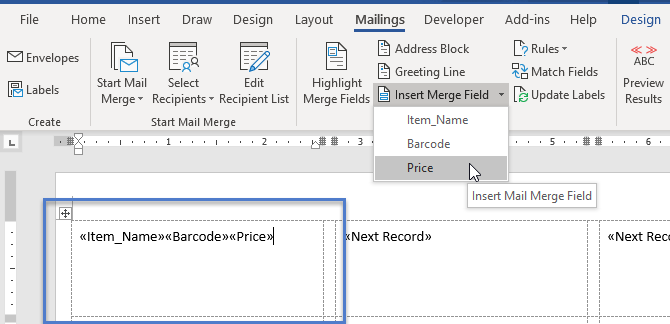
Step 4. Insert Fields
- Insert the merge items into the top-left label, as shown.
Step 5. Add Brackets around barcode field
- Surround the barcode text field with square brackets.
- Any text field surrounded with brackets will be converted to barcodes.
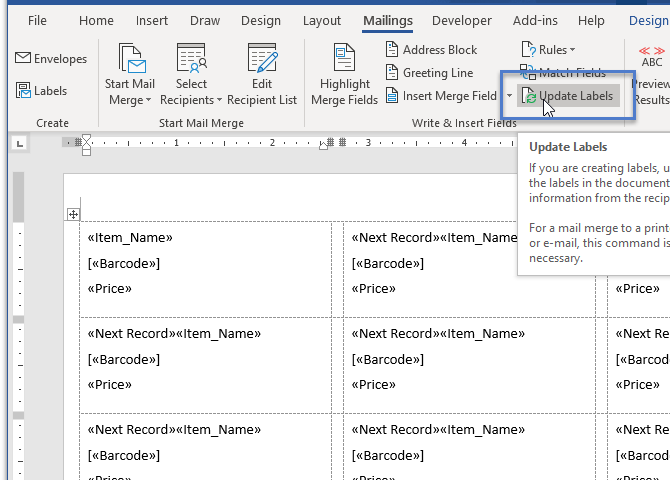
Step 6. Copy data to all other labels
- Click on Update Labels to copy the fields into the other labels on the page.
- To center, click Ctrl+A followed by Ctrl+E..
Step 7. Complete the Merge
- Open the Add-Ins tab and click on Convert All to finish the Mail Merge and create the barcodes.
- Barcode labels are created in a new document. You may print or save the document now.