Data Matrix Barcodes in Adobe InDesign using Data Merge
Data Matrix 2D Barcodes in Adobe InDesign using Data Merge
- This tutorial shows how to create QR Code 2D barcodes in Adobe InDesign using an Excel file as a data source.
Step 1A. Import module into Excel
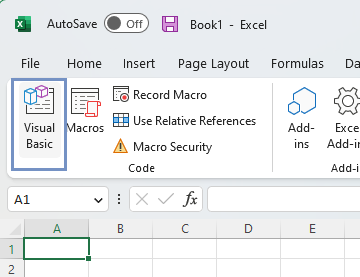
- Click on Developer tab, select Visual Basic, or press ALT + F11 on keyboard
- Right-click the Excel Object and select Import File...

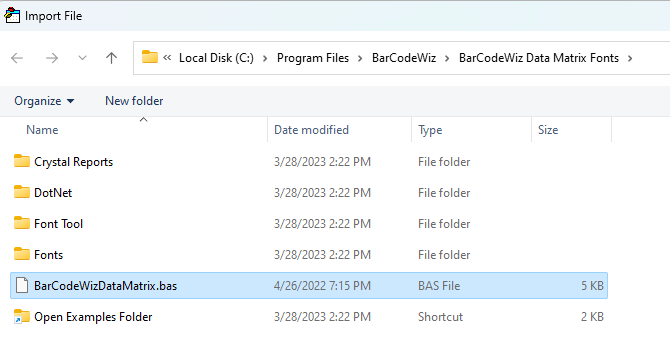
- Select BarCodeWizDataMatrix.bas.
- The default location of the file is:
C:\Program Files\BarCodeWiz\BarCodeWiz Data Matrix Fonts
- The following module should now be part of the Access file.
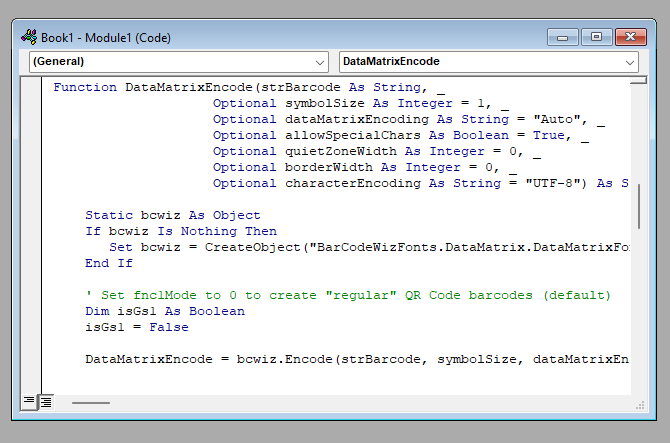
Change the line:
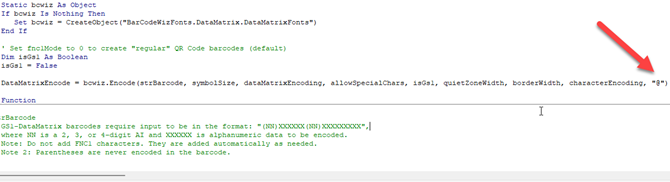
DataMatrixEncode = bcwiz.Encode(strBarcode, symbolSize, dataMatrixEncoding, allowSpecialChars, isGs1, quietZoneWidth, borderWidth, characterEncoding)
to:
DataMatrixEncode = bcwiz.Encode(strBarcode, symbolSize, dataMatrixEncoding, allowSpecialChars, isGs1, quietZoneWidth, borderWidth, characterEncoding,"@")
(Add "@" at the end of paragraph)
Step 1B. Prepare the data to be merged
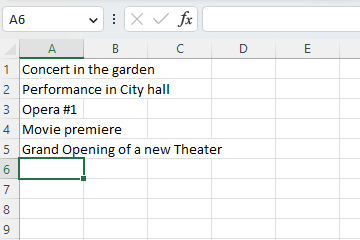
- Open the Excel file with data to convert or enter the values. Our example has the following data:
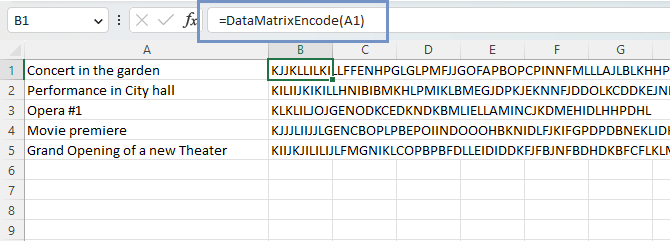
- Use the function =DataMatrixEncode
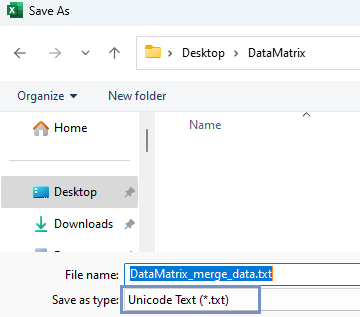
Save the file as Text (Tab Delimited), or CSV UTF-8 (Comma Delimited) format
- Click on File > Save As
- For InDesign versions older than 2022 Select CSV UTF-8 (Comma delimited) and enter the name of the file: DataMatrix_merge_data.csv. Or simply save the file as Text (Tab Delimited), or Unicode Text.
- Close Excel. Otherwise, InDesign will not import the file.
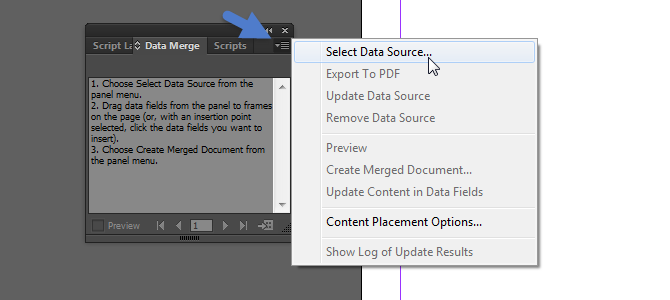
Step 2. Start Data Merge in Adobe InDesign
- Click Window > Utilities > Data Merge

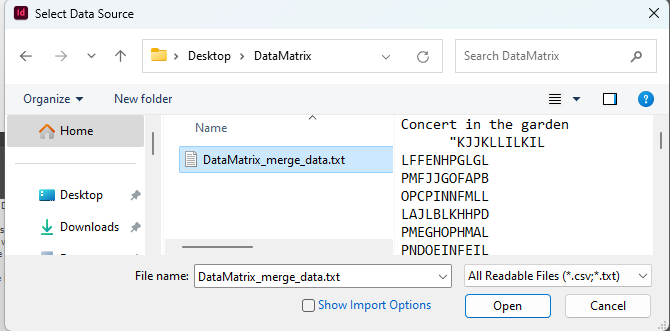
Step 3. Select Data Source
- Right-click the panel menu icon and click Select Data Source...
NOTE! Close Excel before importing the file. If the file is open, InDesign won't open it.
- Browse for the file we saved in step 2 and click Open.
- The fields are now shown in the Data Merge panel.
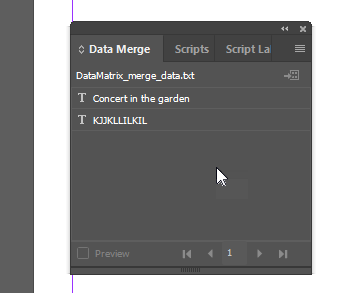
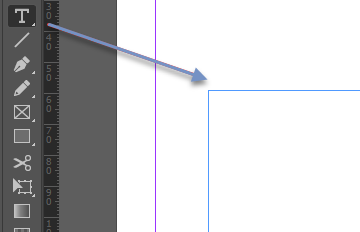
- Insert text field into the document
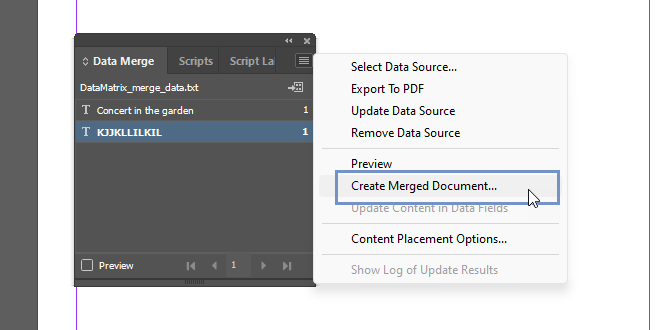
Step 4. Create the Merged Document
- Click on the Create Merged Document button at the bottom of the panel.
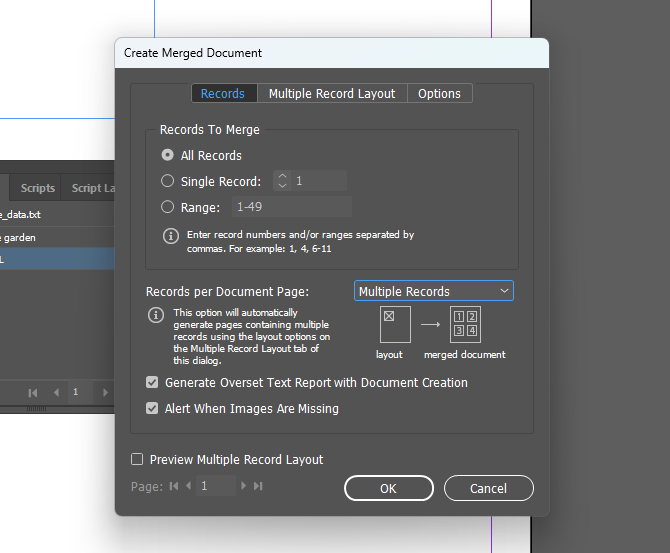
- Select which records to merge and click OK. We are selecting All Records here.
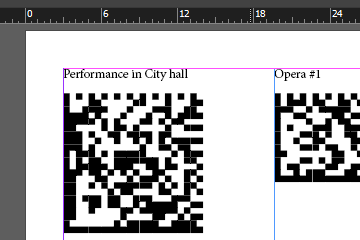
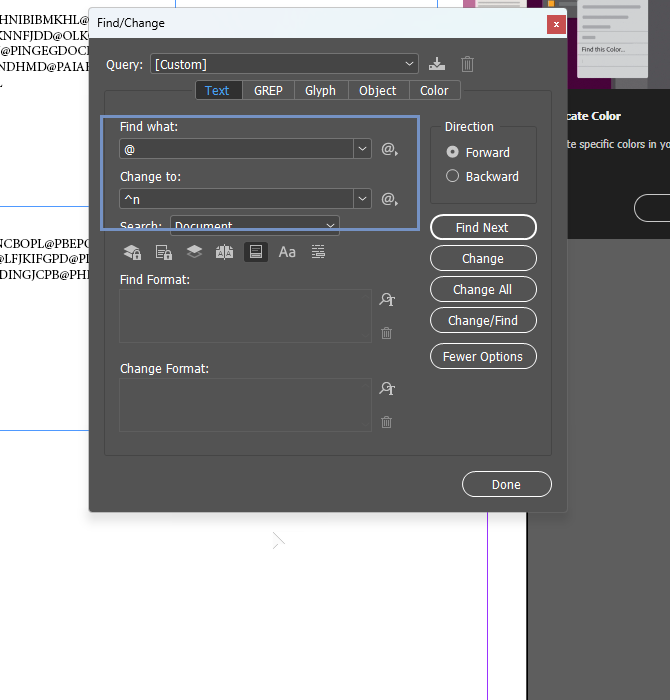
Step 5. Find the @ sign
- Press CTRL + F on your keyboard.
- Set Find what and Change to fields as presented.
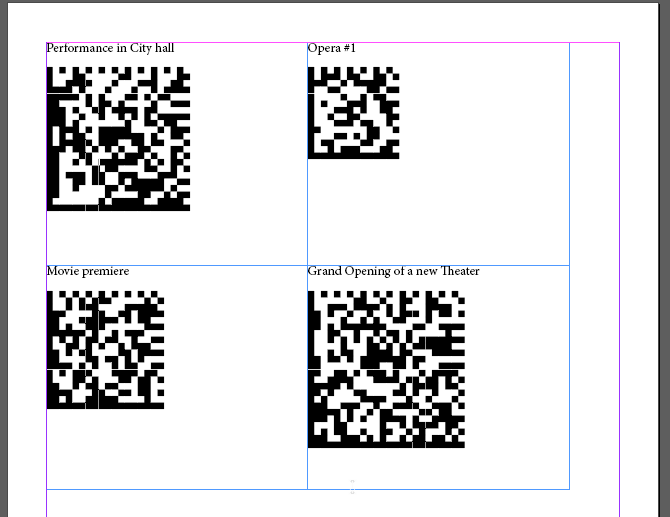
- With all the @ signs removed, the document should look like this

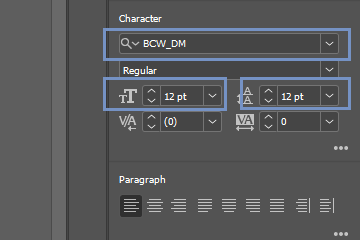
- Set the font to BCW_DM
- Font size to 12
- Line spacing to 12 (should be same as Font Point Size used).
NOTE: For smaller barcodes, you can set the point size as low as 2pt - set line spacing accordingly
Finished!